Start with the Tutorial and a starter Motorcycle
Your first goal in Night Rider is not to buy the fastest bike. It is to complete the Tutorial, get a Motorcycle onto the road, and finish one controlled ride with enough Cash and menu knowledge to choose your next upgrade. Enter the Roblox experience published by Night Rider Official, then follow the on-screen arrows and prompts rather than leaving the opening sequence to explore immediately.
The Tutorial introduces the basic ride before you need to manage the wider map. A recorded beginner sequence shows the player receiving a free bike before riding. After the tutorial, treat that starter Motorcycle as practice equipment: learn how the bike turns, slows, changes camera view, and responds around Traffic before spending your first Cash on appearance items. Use the riding controls guide when you are ready to practice the road portion.
Start the Tutorial and receive the starter Motorcycle
This moment supports the opening route by showing the Tutorial context and the free bike available before the first ride.

A practical first-session target is:
- finish the Tutorial and confirm that the bike is available;
- claim any visible reward in
Shop→Codes,Daily Rewards, andQuests; - spawn the owned bike from
Bikes→Garage; - practice on an open stretch of road before attempting a Police Chase;
- complete one quest or riding activity, then return to the relevant menu and claim its reward.
Night Rider is presented as a test version, so menu labels, vehicle performance, and rewards can change. When a value or button differs from this guide, use the current in-game panel as the authority.
How a Night Rider session moves forward
Night Rider uses a repeatable session-based riding structure rather than a single linear story. You move from menus into an open road, create your own short objective, return to menus to collect or spend resources, and then choose whether to improve the bike, attempt a harder activity, or ride again.
The normal state change is prepare → spawn → ride → receive progress or risk → verify rewards → choose the next activity. Preparation happens in Shop, Daily Rewards, Quests, Bikes, and Tricks. The ride itself can include Traffic, Near Misses, Scenic Level progress, Wheelies, other tricks, and encounters with police. A completed quest may show progress without paying out automatically, so the session is not complete until you reopen Quests and check for Claim.
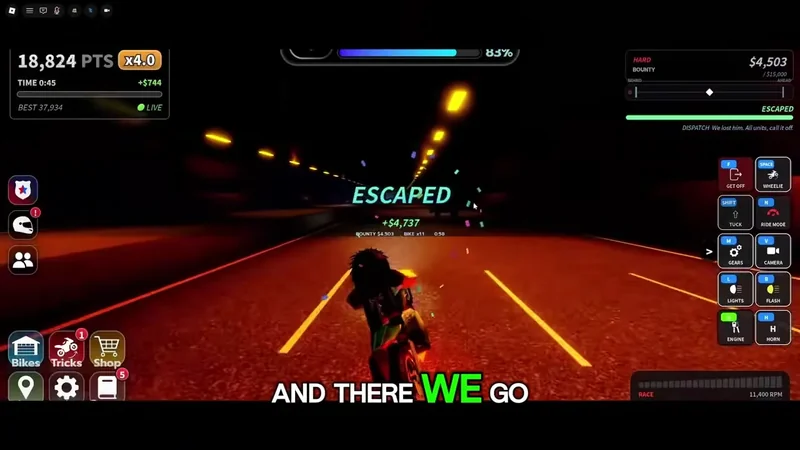
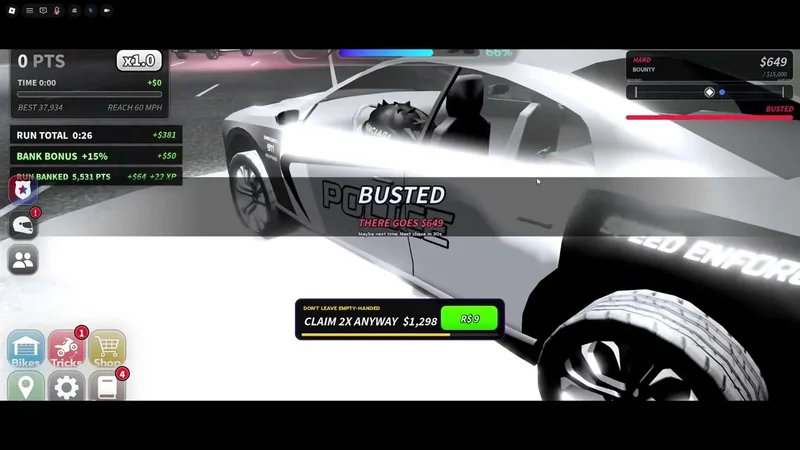
There are two useful kinds of riding session. A safe session builds familiarity and Cash by staying on the road, avoiding unnecessary collisions, and working on a quest. A riskier session uses more traffic or police interaction to pursue a larger challenge. Police Chases can end in ESCAPED, which is associated with a reward, or BUSTED, which can cost Cash. Start with the safe version until you can control the starter bike reliably.
Do not treat every activity as a guaranteed reward formula. Cash can come from riding, Near Miss, Scenic Level, Quests, Daily Rewards, and Codes, but the exact payout for activities is not fully stable in the available records. Check your balance and the current reward panel after each completed action.
Claim early Cash and understand beginner risks
These moments support the beginner systems overview by showing code redemption, quest Cash and claiming, and the risk of escalating a police encounter with a weaker bike.
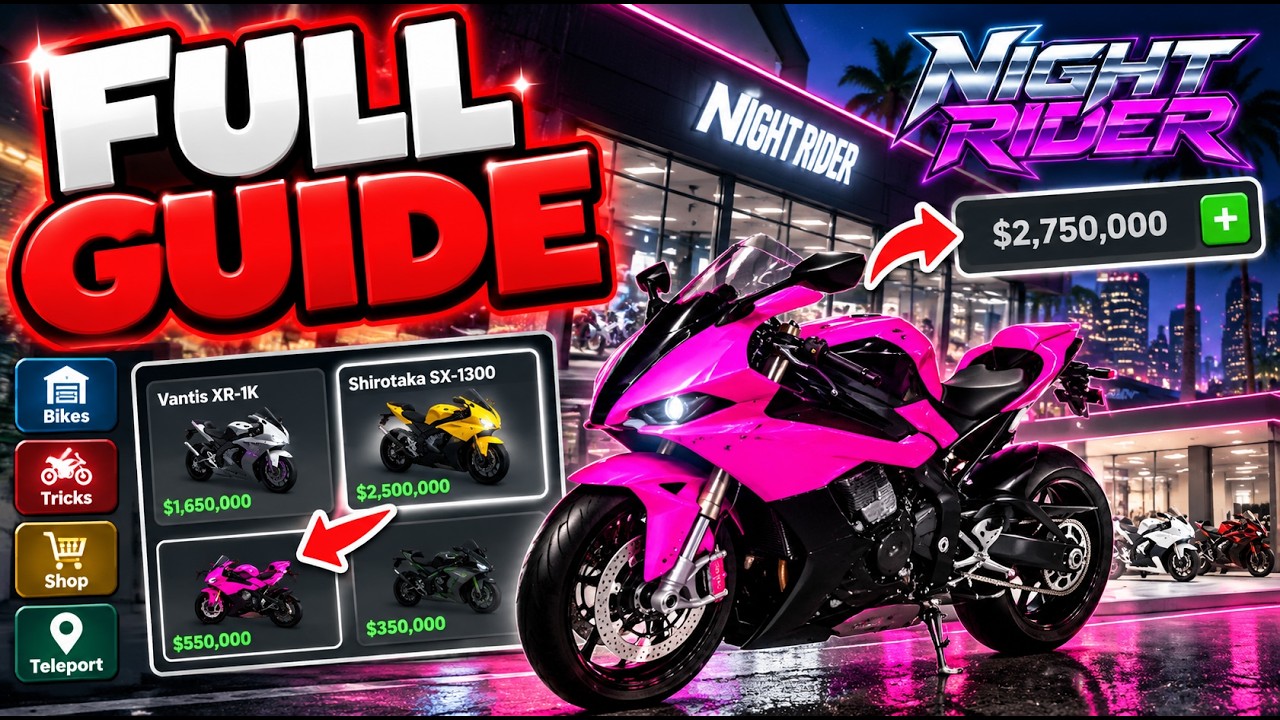
The menus and systems that matter first
These are the systems to learn before comparing expensive bikes:
- Tutorial: The guided opening sequence. Follow its arrows and prompts to learn the first ride and reach the point where the Motorcycle can be used freely.
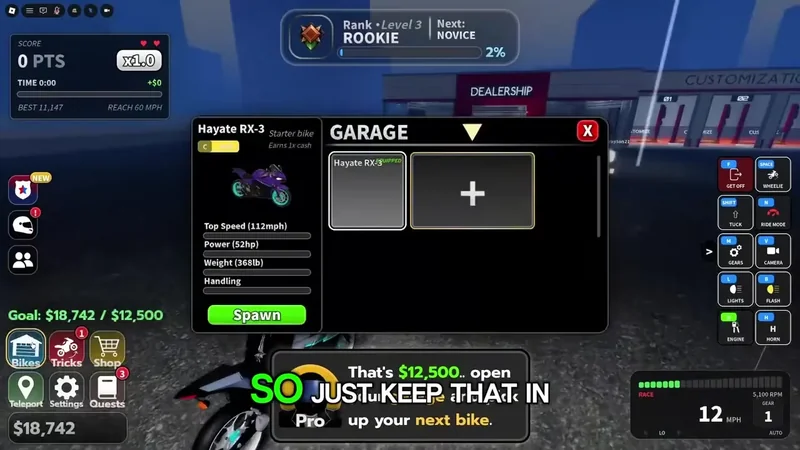
- Garage: Your vehicle management screen. Open
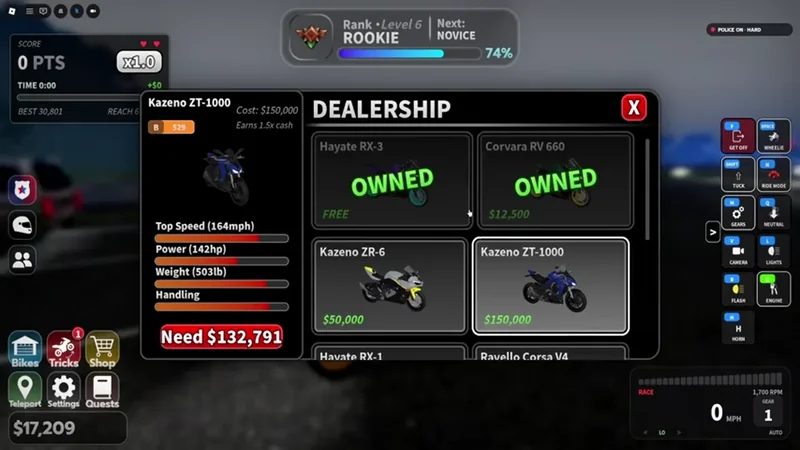
Bikes→Garage, select an owned Motorcycle, and use the greenSpawncontrol to put it on the map. The recorded starter listing,Hayate RX-3, shows 112 mph, 52 hp, and 368 lb, but treat those values as version-sensitive. - Dealership: The buying screen. Use it only after checking your Cash; compare price, speed, horsepower, weight, and the feel you want rather than assuming the highest speed is the best beginner choice.
- Cash: The shared spending resource for Motorcycles, Tricks, Customization, and upgrades. Early Cash can come from Codes, Daily Rewards, Quests, and riding activities, but reward amounts may change.
- Daily Rewards and Quests: Two reliable places to check for claimable progress.
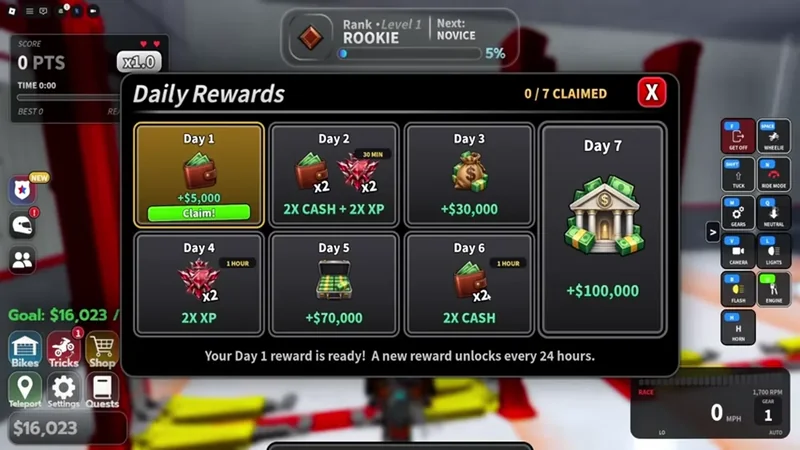
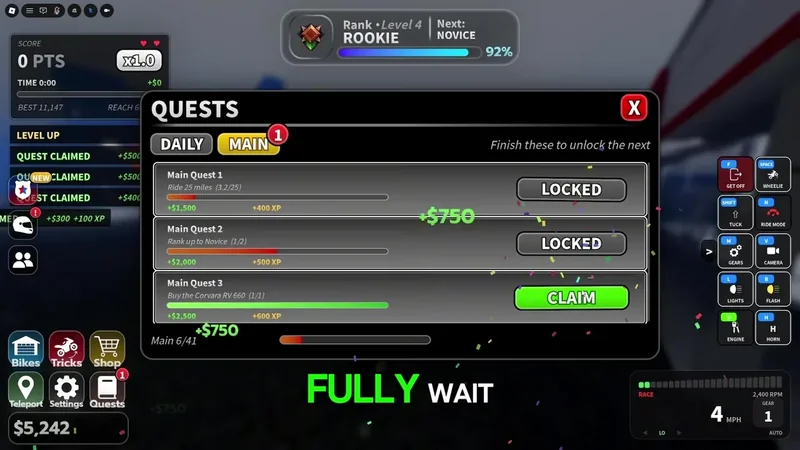
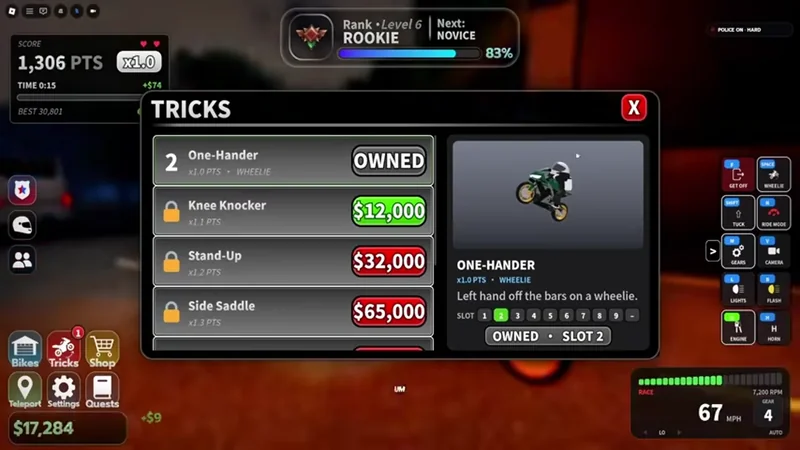
Daily Rewardscan show aClaimbutton; a recorded Day 1 panel shows$5,000.Questscontains Daily and Main objectives, and completed objectives may require a manualClaim. - Tricks: The action menu for ride techniques such as Wheelie and
One-Hander. The recorded setup hasOne-Handerequipped; inspect the current menu before assuming another trick is unlocked. - Customization: The place to change Paint, Finish, Wheels, and available performance parts such as Engine or Transmission. Add changes to the cart and confirm the total before buying, because cosmetic spending reduces the Cash available for a bike.
- Police Chases: A risk system connected to Wanted Stars. A chase can end in
ESCAPEDwith a reward orBUSTEDwith Cash loss, so it belongs after basic steering practice, not at the very start.
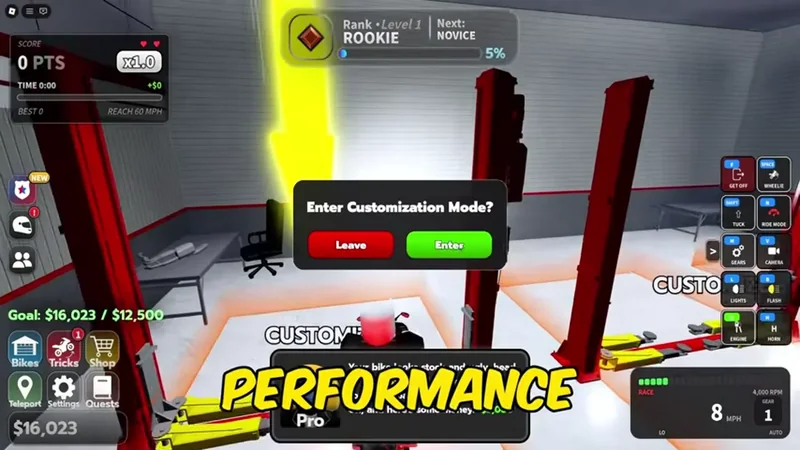
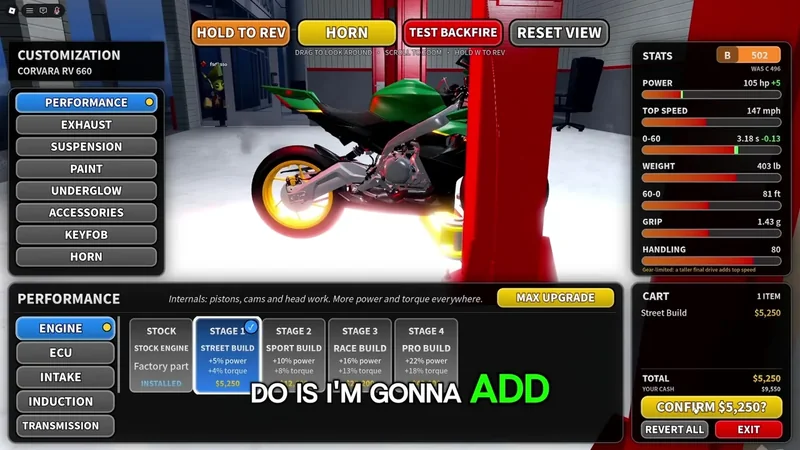
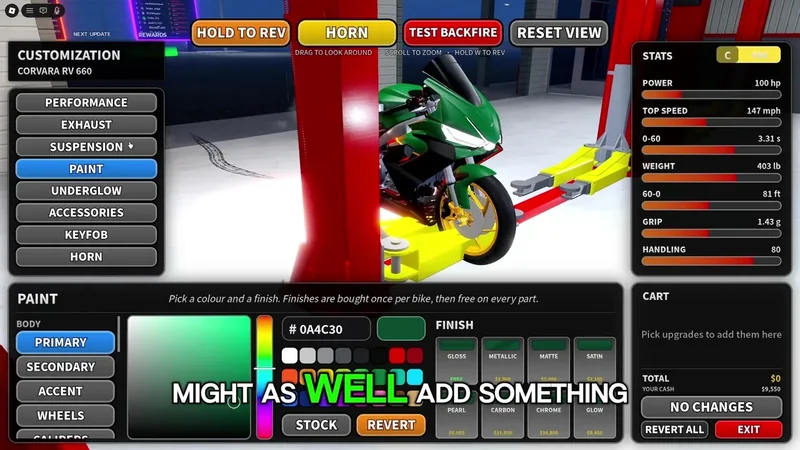
Traffic, the map, Passengers, and Scenic Level provide additional riding context. They make the open road more than a menu-to-menu transfer, but the rules for passenger rewards and some activity payouts are not confirmed consistently. Use them as optional objectives until the current interface explains their benefit.
Your first complete ride
Use this sequence to turn the opening tutorial into a complete, recoverable session. Each checkpoint tells you when to move to the next state.
- Confirm the experience. Check that you entered Night Rider by Night Rider Official. This avoids learning the controls in a similarly named Roblox experience. Checkpoint: the expected Night Rider menus are visible.
- Finish the Tutorial. Follow the screen arrows and complete the initial prompts. If the tutorial gives you a free bike, let the sequence finish before opening unrelated menus. Checkpoint: you can access the regular game flow and a Motorcycle is available.
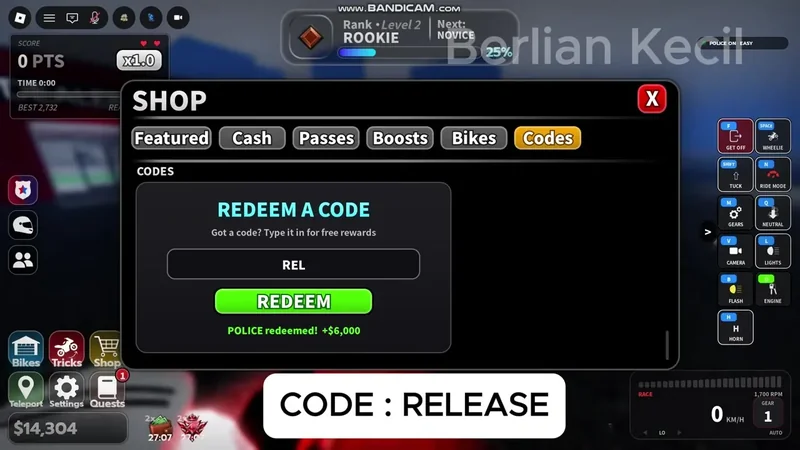
- Check free resources. Open
Shop→Codesand try only codes the current panel accepts;RELEASEis documented as$5,000, while code status can change. Then inspectDaily RewardsandQuestsfor visibleClaimbuttons. Checkpoint: your Cash and claimable items are known.
- Spawn the owned bike. Open
Bikes→Garage, select the owned Motorcycle, and press the greenSpawn. Do not buy a new bike just to start riding. Checkpoint: the bike is present on the map.
- Set up a safe practice route. Choose an open road and begin with ordinary steering, braking, and camera changes. Try first-person, third-person, or Cinematic view only after you can keep the bike stable. Checkpoint: you can slow and turn without immediately wiping out.
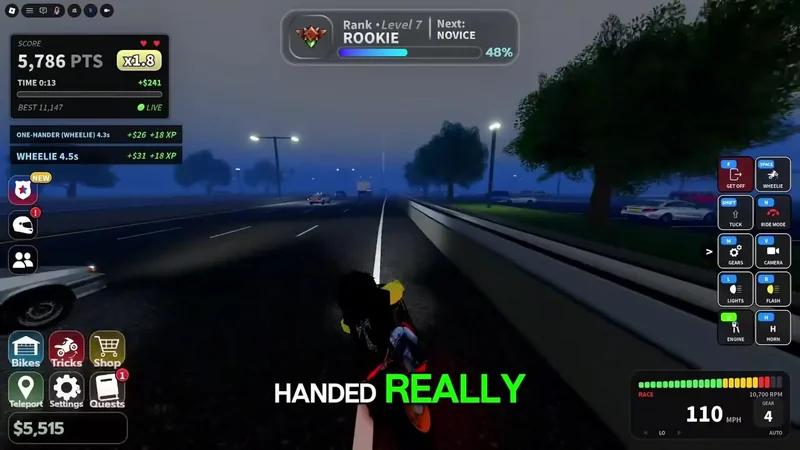
- Add one controlled activity. Practice a Wheelie or the equipped
One-Hander, or work around Traffic for a Near Miss if the road is clear. Keep the first attempt short; the purpose is to observe feedback and control, not to maximize risk. Checkpoint: the HUD or ride state shows the action or its result.
- Work toward one quest. Open
Questsand choose a visible Daily or Main objective that matches what you can safely do. Ride until its progress changes, then return to the menu. Checkpoint: the quest displays completed progress or a clear remaining requirement. - Verify and claim. Reopen the quest panel and press
Claimif it appears. Also recheck your balance andDaily Rewards; completed progress is not always automatic payment. Checkpoint: Cash or XP has been reflected, or the panel explains what remains. - Choose the next investment. If the balance is still small, keep the starter bike and repeat safe riding. If you have enough Cash, compare a Motorcycle in
Dealershipfirst, then return toGarageto spawn it after purchase. The bike and dealership guide explains that comparison. Checkpoint: you have selected riding, saving, or buying as the next deliberate goal.
This route keeps the first ride reversible. You learn the map and menus before spending, and you verify rewards before assuming that a completed action paid out.
Spend Cash carefully and recover from mistakes
Use these priorities in order:
- Secure free claims first. Check Codes, Daily Rewards, and both Daily and Main quest panels before buying anything.
- Keep a usable riding reserve. Do not spend all Cash on Paint, Finish, Wheels, or a newly unlocked Trick before you know the bike handles well.
- Improve control before speed. Practice braking, turning, camera choice, and basic tricks with the owned Motorcycle.
- Compare before buying. In Dealership, review price, speed, horsepower, weight, and current handling impressions. Then spawn the purchase from Garage.
- Treat police as an optional challenge. Build control first; a weak or unfamiliar bike is more likely to end a chase in
BUSTED.
| Mistake | Recovery |
|---|---|
| You wipe out during practice. | Follow the device prompt for `GET BACK ON?`, recover the bike, and return to an open road before trying another trick. |
| You cannot find the bike after buying or joining. | Open `Bikes` → `Garage`, select an owned Motorcycle, and use the green `Spawn` control. |
| A quest looks complete but Cash did not arrive. | Reopen `Quests` and look for the manual `Claim` button; then check the balance again. |
| You lose Cash in a chase. | Stop escalating police interaction, return to safe riding, and rebuild Cash through visible quests, rewards, and controlled activities. |
| You spent too much on customization. | Keep the current bike, prioritize claimable rewards and quests, and postpone further Paint, Finish, Wheels, Engine, or Transmission purchases. |
The key beginner habit is verification: after every menu action, look for the changed state—spawned bike, changed quest progress, visible claim, updated balance, or ESCAPED/BUSTED result—before moving on.
First-time Night Rider questions
Should I buy a new Motorcycle immediately?
No. Finish the Tutorial, claim visible rewards, and practice with the owned bike first. Compare a new Motorcycle in Dealership only after you know your Cash balance and the handling you want.
What should I do if a completed quest does not pay?
Open Quests again and look for a Claim button. Night Rider records show that completed objectives may need manual claiming, so verify the balance after claiming instead of assuming the reward was automatic.
How do I recover after a wipeout?
Use the device prompt labeled GET BACK ON? to recover, then move back to an open road and resume with a simpler maneuver. Practice ordinary steering and braking before trying the same trick again.
Are police chases a good first activity?
Not usually. Police Chases can end in BUSTED with Cash loss, while ESCAPED can provide a reward. Learn the starter bike and build a small Cash reserve before intentionally increasing the risk.